 Repairing Loose Felt on an Autoharp |
 |
| 


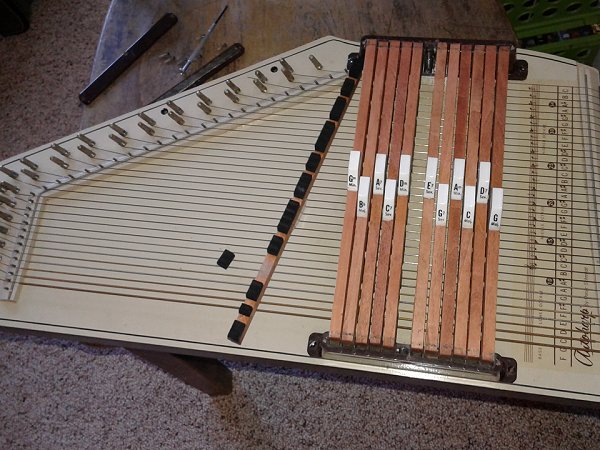
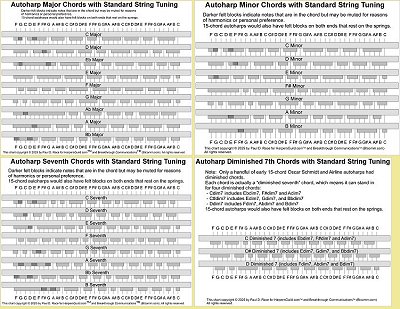
|  Repairing Loose Felt on an Autoharp A few months after I bought my first autoharp, I picked up another one I liked the looks of. It's a late-model Type A. It had a cream finish and natural chord bars.Turns out, it was actually sold by Sears between 1965 and 1967. That I learned from the most definitive book ever written on the history of the autoharp, Becky Blackley's The Autoharp Book, sadly out of print. I've tried to track her down and get her to reissue it on Kindle or some such, but so far I've had no luck. The Autoharp smelled really bad, and I have left it outside on windy days a few times to air it out. The chipboard case it came in was worse. Other than that, it was in playable condition, and I tuned it up and played it for a few minutes every few days for a month or so. Then, one of the chord bars started acting up. Turned out that one of the felt pieces had come loose and was wandering around under the chord bars. I was lucky it didn't fall completely out and get lost as they sometimes do. (I have since acquired several autoharps that had many felts missing altogether, so this was a nice introduction.) Disassembly - First of all, never disassemble an autoharp over shag carpet. To get a sideways look at what you'll be dealing with, check out the graphic below. Although it's showing one of the later versions with plastic combs and chord bar covers, it illustrates the basic construction of all Oscar Schmidt and Chromaharp 5-, 8-, 12-, and 15-chord autoharps. (Our "Autoharp Repair Overview" article shows a cross-section of the Oscar Schmidt 21-chord autoharps.)  This model has two plastic strips holding the ends of the chord bars in place. Three tiny screws hold each of those in place. I had to use a fine-tipped Phillips screwdriver to remove them. Don't lose the little screws. And don't turn your autoharp over when the little plastic strips holding the ends of the chord bars are removed, either, unless you want to spend the next hour tracking down springs, and twenty minutes after that trying to get the chord bars in the correct order. You'll find that our article "Autoharp Factory Tunings" is helpful in that score. Then I lifted the chord bars one at a time to figure out which chord bar was missing the felt piece. Turned out it was the F chord bar. Fortunately, the felt piece was easy to fish out. And discoloration on the bottom of the chord bar told me exactly where it would go back. I glued it in place with general-purpose glue, let it set, then screwed the whole thing back together. It played just as well as it had before. But it didn't play any better than it did before, either. I blame operator error. By the way, you need to use a glue that is NOT water-soluble and that will glue fabric as well as aluminum or wood. "Super-Glue" (cyanoacrylate) does not do well on porus surfaces - you'd have to soak the felt enough to make it solid on one side, let that dry, and then glue the felt to the chord bar. Not a great approach. During this enterprise, I discovered that the foam rubber strips that were supposed to keep the chord bars from clacking against the little cover strips had completely crumbled. If I had had more experience with a 15-chord Type A, I would have realized this sooner. I just thought it was noisy. Sounds like a topic for another article. What If You're Missing a Lot of Felts? Sometimes autoharps that have had "iffy" storage will be missing a lot of felts. If you're lucky, they've been trapped under the strings or at least in the case. Again, you may be able to match up the little loose felt blocks with the glue marks on the chord bars. But you may need to order new felt. If you do, you need to specify whether you have a 21-chord autoharp or anything else. 5-, 8-, 12-, and 15-chord autoharps take felt that's 1/4" wide. 21-chorders take felt that's 3/16" wide. Again, if you're missing just a few blocks, you should be able to cut pieces of felt to match and glue them in place. If you're missing a lot, you might be better off refelting the whole bar. Using a fine-tipped" marker, mark everywhere there is or seemed to be a block, scrape them off, clean off the bottom edge, glue a felt strip on, and notch "V"s under everywhere there wasn't a block, checking your notches to make certain you're centering them over the strings that need to vibrate freely.
Read the text, though - the felt arrangement is basically the same for the chords that appear on 12- 15-, and 21-chorders, but there are differences in the width of the chord bar and how they sit on the springs. (15-chorders have felt all the way to the end; 21-chorders don't, for example.) Don't get overwhelmed, though. Once you've reattached a few felts or recut a few chord bars, you'll realize it's a simple process overall.
And please stay in touch!
|
|
All material, illustrations, and content of this web site is copyrighted ? 2001, 2002, 2003, 2004, 2005, 2006, 2007, 2008, 2009,
Note: Creek Don't Rise (tm) is Paul Race's name for his resources supporting the history and music of the North American Heartland as well as additional kinds of acoustic and traditional music. For questions, comments, suggestions, trouble reports, etc. about this page or this site, please contact us.
| ||||||||||||||||||||||||||||||||||||||||||||||||||||||||||||||||||||||


