 Your First Autoharp |
 |
| 


|
Your First AutoharpThis page is for people who find themselves owning an autoharp, for whatever reason. Maybe you got a new one as a Christmas present, or you inherited Great Grandma's relic. The point is, what do you do now?First of all, if you have a used one, even a very used one, you're likely to be able to learn on it. Frankly, you're probably better off starting with something you don't have a fortune into than automatically sinking several hundred dollars into an autoharp that might not be the best choice for you down the road. (I have friends who claim it's not worth starting autoharp unless you can afford to sink a fortune into a luthier-built instrument from day one. They're wrong.) You Can Learn Basics on Almost ANY Autoharp. As examples or "beginner" autoharps you're most likely to encounter::
First StepsBasically, we're going to walk you through the following stages, which you can do with any playable or restorable autoharp.
The first two are most important if you have acquired an older autoharp, but they may apply to a new one as well. EvaluatingYou want to know if your autoharp is playable or can be easily made playable. You also want to know if there are any potential problems lurking.This checklist may seem long, but it will only take a few minutes on most autoharps.
I'm a tinkerer, and I've repaired many autoharps, so very few of these issues bother me much, but a combination of serious issues, such as a warped face, evidence of pulling apart, and/or a bad smell that I can't get rid of, will put me off. If you're new to all of this, and the autoharp you've received ticks more than a handful of the items listed above, you may want to hold off on sinking real money or time into it until someone with more expertise has a look at it. That said, if we're talking about minor repairs like a few loose felts or a couple missing strings, you might as well learn to fix them, because those are maintenance issues that every autoharp owner has to deal with eventually. Finally, if your autoharp is supposedly new and ticks any of these boxes, get your money back right now, including shipping and tax. CleaningIf the only issue with your newly acquired autoharp is a layer of dust, cleaning isn't generally a problem.In fact, we have a short video here. If the finish is mostly intact, we use an old sock, a cleaning fluid, a very thin table knife or ruler, and a bunch of Q-tips. The cleaning fluid (something like Fantastic that cuts oil but doesn't need rinsed) is to dampen the sock and Q-tips. Note: If the finish is badly damaged, furniture polish may be a better choice than cleaning fluid. The knife or ruler is to work the old sock under the strings aross the face of the autoharp under the strings. The Q-tips are to get around the tuning pegs and near the bridges where the sock can't reach. Sometimes you can use a vaccuum to get any dust bunnies out of the hole, though getting deep inside the instrument might require some creativity. Generally, an autoharp that is plagued only by dust takes no more than an hour to clean. TuningThis part will take you some time at first, especially on a 36- or 37-string autoharp.
If you have a keyboard or piano, it's usually easier to tune to that first. Yes, digital tuners are cheap, and you can even get apps on your phone, but when you're tuning an autoharp that hasn't been tuned for some time, you're not going to get it that close the first time or two you tune anyway. And guessing whether you're high or low when you're several pitches off is harder with a digital tuner than a keyboard. Most autoharps have the note names near the bottom edge where the strings attach. Unfortunately, it's not always easy to tell which tuning peg goes to which string - even when there are labels up by the tuning pegs. Whenever there's a chance of confusion, I start wiggling the string down by the note name strip and look to see which string is wiggling by the tuning pegs. (What's even more fun is that I've seen the note name page off-center by a quarter inch - about one string's worth - on two fairly new 21-chorders - one reason I start with the low F on modern instruments.) Many books recommending finding middle C on the piano and finding middle C on the autoharp, tuning that string first, then working your way outward. I generally start with the lowest string (the second F below middle C) and work my way up. The picture below shows you how to find those notes on a piano. The string numbers and names apply to Oscar Schmidt and Chromaharp 12-, 15-, and 21-chorders. If your autoharp is smaller or came from Europe, you may have to do some research.  If you want a printout of that picture, click here for a pdf file. Be sure to print it in "landscape" mode. If you're using a digital tuner, middle C will be labeled "C4." The low F string on a 36- or 37-string autoharp will show up as "F2" on a digital tuner. If your autoharp hasn't been tuned in a very long time, consider wearing eye protection. If nothing else, make certain that you're not leaning over it with your face a few inches away while you tune it. When you know for sure which string you want to tune and which pitch you want to tune it to, place the open end of the wrench over the tuning peg as far as it will go. Generally, you'll then pull the wrench handle clockwise to tighten the string (a few rare instruments go the other way). When you get the string close to where you need it, you may discover that you find yourself pulling it slightly sharp, then lightly nudging or tapping the wrench handle down to loosen the string to the proper pitch. This is counter-intuitive for guitar, banjo, and mandolin players, who are used to dropping the pitch, then bringing it up to tune. Go ahead and do the rest of the strings individually, not getting too worried when you notice that the first strings you tuned are going flat already. If the instrument hasn't been brought up to pitch in years (or maybe decades), it will take some time to settle in. If a string you're trying to tune sounds completely dead, you may have a loose felt dampening it, or maybe one of your chord bars isn't popping back up properly. Neither of these is reason to panic. Note: If, during tuning, you notice any sign that your instrument is beginning to pull itself apart, that pieces are separating or the face is warping, stop tuning immediately and decide if the instrument is worth repairing before you proceed. A great number of late-1800s and early-1900s autoharps have come down to us with extra screws holding the back on or some such. Don't feel bad if you have to resort to that, or if the autoharp seems too far gone even for that. (Newer OS autoharps with an aluminum anchor bar may have other issues that require repair. This Hal Weeks video describes that problem and how to address it.) Once you're through tuning each string the first time, start over. By the time you've finished, your autoharp may be straining under 1500 pounds of string pressure, enough to pick up, say, a concert grand piano. No wonder the things take a while to adjust to the strain after "resting" for years or decades. Generally, a seriously out-of-tune autoharp needs tuned three times the first day. It will need tuned again the next day, maybe twice. It will need tuned again the third day, after which it should start to "settle in" and just need occasional tweaking. With your autoharp still on the workbench or table, strum all of the chords, hitting all of the strings. If all of the chords sound good, you've accomplished your task. Enjoy the sound of a freshly-tuned autoharp. Holding Autoharps were originally designed to be played in the lap or on a table or stand. You'd push the chord bar buttons with your left hand. With your right hand, you'd play the strings between the chord bars and the end block where the strings attach. That's why the note name strip was always on that end. Autoharps were originally designed to be played in the lap or on a table or stand. You'd push the chord bar buttons with your left hand. With your right hand, you'd play the strings between the chord bars and the end block where the strings attach. That's why the note name strip was always on that end.
Nowadays many autoharps are designed so that it's actually hard to play them that way. That's because in the 1930s, autoharp players like Cecil Null and Maybelle Carter started holding them in a more upright position. You rest the end with the tuning pegs against your left shoulder and wrap your left arm around it so you can push the buttons on the front. Most autoharps have a shallow notch that you can rest on your left forearm near your elbow. Then you play the strings above the chord bars with your right hand. If your arms are too short to play this way without extreme discomfort, you may want to look for alternatives you can reach around. This article has some suggestions. StrummingThis is the part that gives you "instant gratification," the same "reward" that makes little kids bang on the piano as soon as they figure out it makes musical sounds. You can use a flatpick, although learning to wear and use a thumbpick (right) will help you prepare for more advanced playing later. Holding the autoharp cradled in your left arm with your left hand over the buttons, push any button hard enough for the felts to settle against the strings and strum the strings with your right hand, starting from the lower strings and going toward the high strings. Then press another button as you release the first one and try again. You'll notice that if you strum before you push the next button all the way, you'll get noise, not music. But most people adapt quickly. Practice this a few times, until you get the hang of strumming the strings (and maybe changing chords). If you just want to practice strumming one chord, you can do that to accompany songs like "Are You Sleeping," "Row, Row, Row Your Boat," "Three Blind Mice," and "The Farmer in the Dell." Try some 2-chord songs - When you're satisfied with how your strums sound, it's time to progress to songs that require you to change chords. Autoharps are designed so that the chord bars you're likely to need for any given song are close to each other. As an example, if you're playing a 2-chord song in C, the chords you're most likely to use are C and G7. So you'll find the button for G7 very close to the button for C. The picture below shows where to find the C and G7 chord bar buttons on the three most common autoharp setups.  If you have some other setup, find the C chord first, and you'll nearly always find the G7 chord within an inch of it. As an example of a 2-chord songs, we've put a simple arrangement of "Buffalo Gals" below.  With your autoharp up against your shoulders, wrap your left arm around it so you can press the buttons with the fingers of your left hand. Put one finger on the C button and one finger on the G7 button, and let-her-rip.
I would recommend practicing them all, just so you get the hang of making that chord change until it becomes automatic. If old-timey songs really don't do it for you, though, there are quite a few old radio hits that can be played with two chords. We don't print them out here because we respect other people's copyrights. But they're generally easy to figure out once you're used to two-chord songs. Chuck Berry's "You Never Can Tell," Hank Williams' "Jambalaya," Don Von Tress' "Achy Breaky Heart," John Lennon's "Give Peace a Chance," the Carolina Chocolate Drops' "Cornbread and Butterbeans," Kingston Trio's "Tom Dooley." "Cheater's Transposition" - If any of these songs are too high or low for you to sing when you play them in C, just move your fingers over to the F and C7 chords. Where the lyric sheet says "C," play "F." Where says "G7," play C7. Because your fingers are already used to alternating between C and G7, you should have no trouble just using the same motion to alternate between F and C7.  If you "Google" 2-chord songs, you'll find quite a few that use other chords. If you have the chords on your autoharp, go for it. If you find a song that has chords that AREN'T on your autoharp, you can always "Google" the song title with a different key. For example, you can't play "Eleanor Rigby" in E minor on a 12- or 15-chord autoharp because they don't have an E minor. But if you Google "Eleanor Rigby in Dm," you'll find a version that goes between Dm and Bb. Or if you try A minor, you'll likely find a version that goes between A minor and F. Just put your fingers on those two buttons and jam away! Try Some 3-Chord Songs - Three-chord songs are everywhere, in every style of music. There are thousands. On your autoharp, you'l notice that the third chord for most of these songs is close to the first two chords. The picture below shows where to how to find those three-chord "clusters" for various keys on the three most common autoharp setups. If you have trouble reading the fine print, click on it to see a bigger version.  Ninety-nine percent of 3-chord songs follow a pattern that your autoharp is built to take advantage of. So, for example, the key of F uses Bb, F, and C7. The key of C uses F, C, and G7. The key of G uses C, G, and D7, and so on. That's why the chords on autoharps are arranged the way they are. So, for the most part, you are using the same patterns for every 3-chord song - you just start with your fingers in a different place. About the Key of D on 15-Chord Autoharps - Three-chord songs in the key of D almost always need G, D, and A7 chords. But they're nowhere close on 15-chorders, either from Oscar Schmidt or Chromaharp. That's because Oscar Schmidt added D by glomming it out on the end of the traditional 12-chord arrangement, and Chromaharp simply copied them.
Don't let it put you off. Learn everything you can on your 15-chorder, and you'll have a better idea of what to demand in any future upgrade. We have the lyrics and chords for several old-timey 3-chord songs in song sheet, but you can "google" things like "3-chord pop songs," "3-chord Bluegrass songs," "3-chord Country songs," and so on. You'll never run out of material to enjoy. Once again, 99% of the three-chord songs that we list or that you'll come across in random searches follow a pattern represented by the chord clusters shown above. If the key of the song isn't available on your autoharp, or if you can't sing the song in that key, simply move your fingers over to another chord cluster and play it anyway.
Next StepsIf you've got this far, you've learned how much enjoyment you can get out of your autoharp and a few simple songs.Our "Playing Autoharp Overview" article goes into more detail about playing more advanced songs in more advanced styles, including playing the tunes to songs, using fingerpicks. The same article also provides links to several helpful videos that cover essentially the same content. So if what we wrote doesn't make any sense to you, the videos might. Our "Autoharp Repair Overview" article explains the basic workings of autoharps. Every autoharp owner winds up doing some minor repair on their instrument eventually. Hopefully this article (and others) will show you there's nothing to be afraid of. Our "Tweaking Autoharps Overview" explains the most common "hacks" people perform on their autoharps to make them more useful for their preferred style of music, etc. We don't recommend any of these to beginners, but some people do, so we're giving you this resource in case you want more information, or if you just want to know what terms like "semi-diatonic" mean.
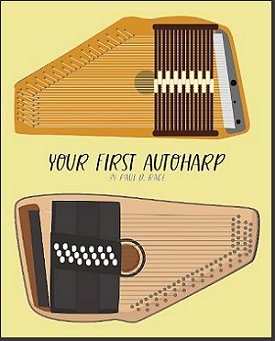
Learning to play an autoharp that is in repair and perfect tune is one thing. Owning an autoharp, is another. Countless readers who have acquired autoharps through gifts, inheritance, thrift shops, auction sites, or impulse purchases have no idea where to begin, what to look for, how to troubleshoot minor issues, and so on. Of course, we also have tips that ease you into playing all sorts of tunes. One reviewer has said it has more "meat and potatoes" than other, much more expensive books. Please click on the picture for more information. Other Publications - In addition to those online resources, many good instructional books and dvds are available. Check our "Autoharp Publications" page for details. ConclusionThe most important thing is to have fun with your autoharp, even if you never play it "right." You learn all kinds of things about music just by playing one. In fact, a professional acoustic guitarist just told me that getting his hands on an autoharp when he was young taught him so much about music that he was motivated to take up guitar. Some 40 years later, he's the premier acoustic guitarist in our region.So there's no downside and a lot of upsides to learning and playing autoharp. And if you can jam with other people, that's even better.
And please stay in touch!
|
|
All material, illustrations, and content of this web site is copyrighted ? 2001, 2002, 2003, 2004, 2005, 2006, 2007, 2008, 2009,
Note: Creek Don't Rise (tm) is Paul Race's name for his resources supporting the history and music of the North American Heartland as well as additional kinds of acoustic and traditional music. For questions, comments, suggestions, trouble reports, etc. about this page or this site, please contact us.
| |||||||||||||||||||||||||||||||||||||||||||||||||||||||||||||||||||||
